
Business events for Dynamics 365 Finance comes with a couple of out-of-the-box endpoints that enables a seamless integration with most Azure tools available for event-based integration scenarios: Event Grid, Event Hub, Service Bus Queue and Topics, Power Automate and Blob Storage.
For anything else not listed, like any web API or web application hosted on-premises or at any other cloud vendor, or even Logic Apps or Azure Functions, you can still publish your events by using the HTTPS endpoint.
Setup and activate a HTTPS endpoint in your Business Event is pretty similar to other endpoints, using the Azure Key Vault to store the configuration – in this case the URL address.
In this post I’ll show a simple scenario using Azure Functions to receive user events (via HTTP as a JSON payload) from Dynamics 365 for Finance and Operations with Business Events framework.
Step 1: Setup the resources on Azure
Azure Functions (Optional)
First, create the Function App and add a new function, selecting HTTP trigger as template. For the sake of simplicity, I’m using a basic function running on Node.js.
NOTE: Skip this step if you already have an HTTPS endpoint to test that accepts POST requests, and move to the next resource setup (Azure AD).
Once it’s done, click on “Get Function Url” and copy the URL.
Now click on “Code + Test” under the Developer menu (left), and change the content to the following:
module.exports = async function (context, req) {
    context.log(req.body);
    context.res = {
        status: 200,
        body: "Event received"
    }
};
This will output the request body payload into the log, so we can monitor in real time when it receives a request.
Save and close it.
Azure Active Directory
Next, go to Azure Active Directory > App registrations > New registration. Enter any name and click Register. The Redirect URL is not needed.
Open “Overview” tab and copy the Application ID, you’ll need later.
Click on “Certificates & secrets” under Manage menu (left) and add a new client secret. Copy the secret key as you won’t be able to do it later.
Azure Key Vault
Create a new Key Vault – or use one existing, if you already have. Open the “Overview” tab and copy the DNS Name URL. It will look like this:
https://{keyvault-name}.vault.azure.net/
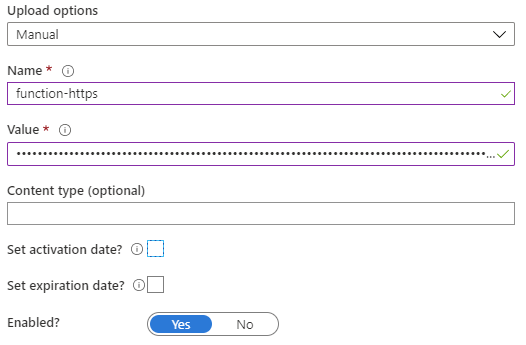
Save it for later. Go to “Secrets” under Settings menu (left), and click on “Generate/Import”.
Choose any name for the Secret – take note as you’ll need it later – and insert the URL from the Functions app you created earlier (or from any other service you’re using) in the “Value” field. Leave the other fields as it is, and just make sure Enabled = Yes.
Open the “Access policies” under Settings menu, and click on “Add Access Policy“. In the “Select principal” field, select the Azure AD application you just created.
In the “Secret permissions” drop-down, select only Get and List. Leave all others blank.
NOTE: make sure to click SAVE back in the access policies window after add the policy. It’s easy to miss this step.
You should see your the Azure AD application under the Application access policy group, with the Secret Permissions set.

Azure resources are done – now let’s move to the next step.
Step 2: Setup Business Events in FinOps
In your Finance and Operations environment, go to System administration > Setup > Business events > Business events catalog, click on “Endpoints”, and add a new.
Select “HTTPS” in the list, using the following values:

Enter the Endpoint name and for the remaining fields, use the information copied from previous steps. Azure Active Direction application ID and Azure application secret are respectively the Cliend ID and Secret ID copied when you registered the application on Azure AD. Key Vault DNS name and Key vault secret name are the values copied from the Azure Key Vault settings.
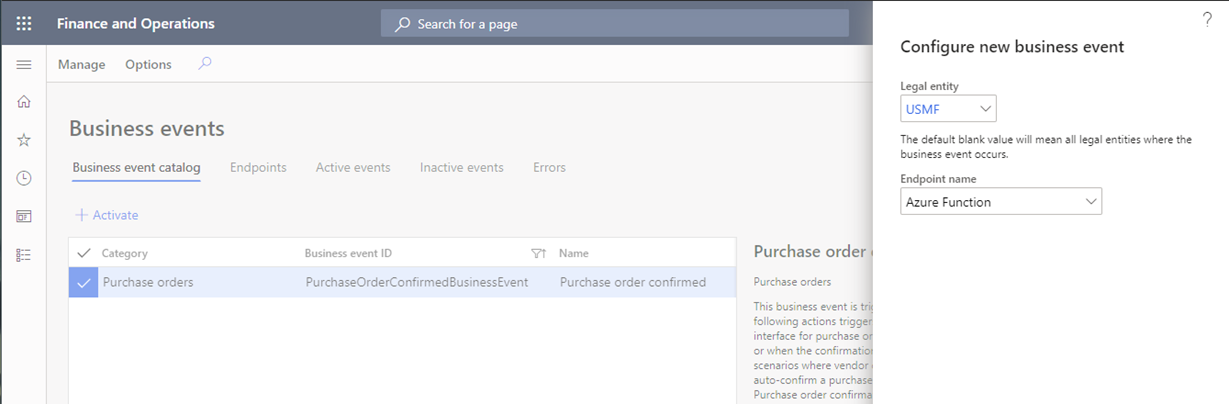
Done that, choose an event and activate it using the endpoint created. I’m using the Purchase order confirmation on legal entity USMF (Contoso database).
Assuming everything was done correctly, you should see the confirmation:

Step 3: Triggering a new event
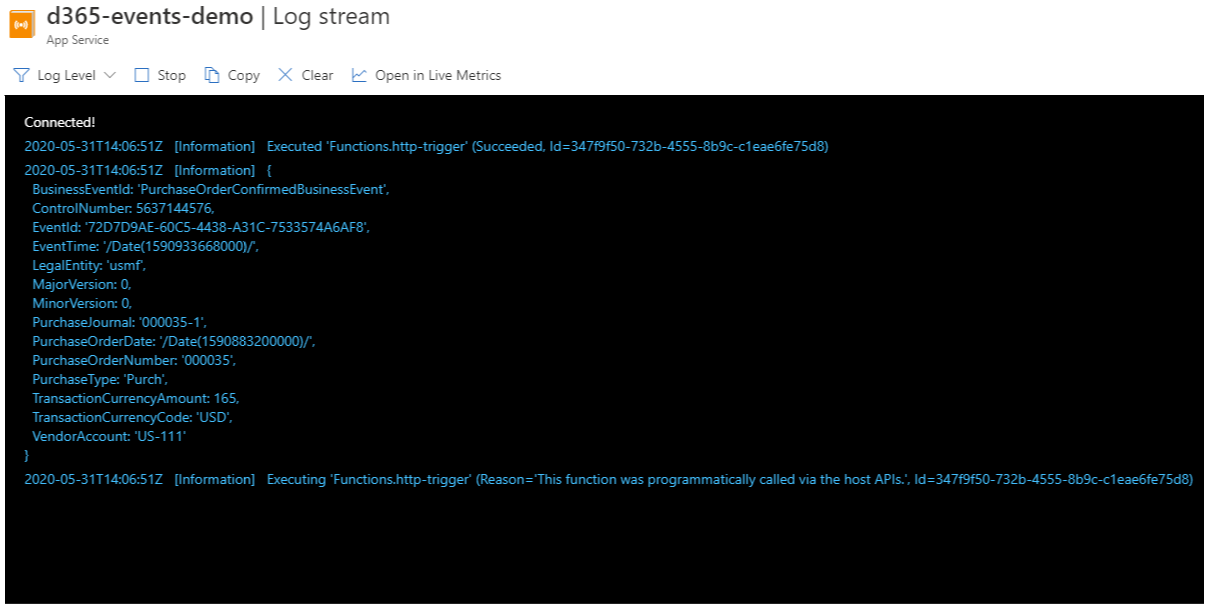
Before trigger the event, if you are using Azure Functions, open you function in the Azure Portal and click on “Log stream” under Monitoring menu (left). You will see a console streaming real-time log entries from you function. Leave it open and go to FinOps.
With everything setup, it’s time to choose a Purchase order to confirm to trigger the event and check the output in the function log stream console. Just remind to do that in the same legal entity used to activate the event endpoint.
At this point, any future changes in the HTTP endpoint – let’s say you need to update the access code in the URL, or try it out with a different application, like Logic Apps or any other web API – you just need to update the Key Vault secret with the new URL. No changes are required in FinOps or Azure.
Enjoy.

Thanks for sharing!
Are you sure that we actually need to give the API Permission for the Registered Application? The permission states to be used for impersonation, but the configuration never handles username + password (password flow).
By adding the Registered Application directly using the Access Policies, you allow direct access. This enables you to use the client_credentials flow (ClientId + Secret), which is in fact what you are configuring inside D365FO.
I would argue that the API Permission can be left out, and that you don’t need to do any consent either – and it should still work based on the rest of your blog post.
LikeLiked by 1 person
Thanks Mötz, you’re right. I’ve used API permissions to run some tests but it’s not required. I’ve updated the post.
LikeLike
Followed similar steps, but I couldn’t see the output, do you have any videos on D365 F&O triggering Business events from azure functions?
LikeLike